Water Irrigation Woes

0

Posted by Aimee | Posted in Experiments, Garden Planning, Irrigation | Posted on 27-04-2009

Tags: , ,

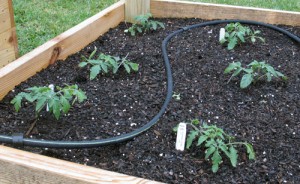
The soaker hose irrigation I decided to install in my garden is giving me some problems. Even though we have tried two different pressure regulators it seems the pressure is still too high. We have large streams of water spurting from the hose going off in whatever direction they feel like, often landing on the yard and not putting the water where I need it, in my garden. As a result some plants are not getting any water at all.

I went ahead and paid out extra for the nicer brass water pressure regulator. We just could not get it to work right, but that was during tax season and we were trying to set up the system in the dark holding flashlights to see so we grabbed the cheaper, non-adjustable plastic version and threw it on. The important thing was that we start getting some water to the plants since we were unable to take the time to water them. Now, in these last two weeks we have received more than enough rain so I have been putting off the task of fixing the irrigation system. After doing some research online though it looks like an underground irrigation system would have been a better idea.

I have to point out though that the underground irrigation system I have been looking at may require a lot more talent than I have to install. It seems though that the extra set-up time and cost would be worth it in the long run. An underground system loses almost no water to evaporation, where as the soaker hose will lose a fair amount of moisture to evaporation on hot, sunny, or windy days. Before making any final judgments though I think I am going to try the underground irrigation system on the next couple of garden beds and compare with the results from the first couple planting beds which currently have the soaker hose system. This is all assuming I can get them both set-up and working properly. Once I have some results I will post a follow up to this. Also any suggestions on better irrigation would be more than welcome.

Raised Garden Bed, No Borders

0

Posted by Aimee | Posted in Guides, Raised Beds | Posted on 22-04-2009

Tags: , , , ,

Previously, I mentioned how appropriate I felt raised garden beds are for the Houston area. What I did not talk about was how easy it is to make a raised bed even without framing materials. The edges may not look as neat but the cost is very low. You will only need a couple of things before you can get started. First you will need a lot of newspaper. If you do not have easy access to this, you can ask your neighbors for theirs when they are done with it or get the grocery circulars when they go out of date, or even just save the grocery circulars for a couple of months. Also you will need bags of peat moss, compost, garden soil, fertilizer is preferred and seeds or transplants to go into your ready garden.

The soil mixture does not have to be an exact 1-1-1 ratio, you can mix it up a bit just remember that it is very important to have a lot of organic matter in the soil. The organic matter in the materials I suggested comes from the peat moss and compost. If you have compost from your home this is even better. You can space this project out over a couple of days or even weeks if you want to, just make sure that if you have exposed loose soil you keep it moistened to help it not fly away.

The first thing you will want to do is take a hose or piece of yarn and mark off where you would like your garden bed to lay. You can make it any shape you want, so long as you can reach to all the spots in the middle. It is a good idea to take a look at your shape from many angles and think if for any reason the shape or location needs altered. Is the garden bed going to be in a high traffic area? Is there room for the mower to get around it easily? Is there convenient access to water? Will the vegetables or flowers get enough sun? Any thing else the garden might be in the way of?

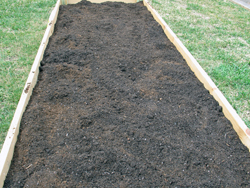
The nice thing about this method is that there is nothing you need to do to prepare the soil. The whole raised garden bed is going to go right on top of the newspaper, which will be covering the current grass or soil to act as a weed barrier. Once you are sure that the garden bed is exactly where you want it lay out newspaper within the borders, cut the papers to fit neatly and make sure the whole area is at least ten sheets thick. Then, wet the newspaper lightly to keep it from taking flight. Now you can remove your border marker. Then the soil materials go on in layers on top of the newspaper, each layer about two inches or so thick, the order is not overly important just add in some organic slow release fertilizer with each level. Make sure to use the recommended fertilization rates, just divide it by the set of layers you plan to have, so half as much for two sets of layers or one third as much for three sets of layers. I do suggest having the top layer be top soil. After a while though it will all get mixed together so this part doesn’t really matter it is mostly because the garden soil will look best on top. You do want to slant inward slightly from the base to the top. That way your bed will not spill over the borders you have set.

Mist the soil carefully at first and then plant your seeds and/or transplants. All you need to do is scoop out a little soil where the transplants or seeds are going and then back fill. Then water the bed more thoroughly. Congratulations you now have one very nice, very easy, low cost raised garden bed. If later on you want to dress the beds up a bit, you could just get some cheap landscaping stones and surround it.

A Few Thoughts

0

Posted by Aimee | Posted in Irrigation, Supplies | Posted on 21-04-2009

Tags:

Well alright, after about ten minutes of reading and fidgeting I got my new water timer up and running and I like it quite well. Now I just need to see how it does over time. I do know that after I set it up last night it felt like Christmas. The first thing I wanted to do was wait at the door to see if it came on like it was supposed to. Now I just have to get the rain gauge that can be attached so it will only water the plants when they need it.

A timer isn’t for everyone but it helps me out a bit since I know I will be gone for a couple weeks straight this summer and without the timer my poor garden would shrivel up. I still am working on the best solution for the many containers that will need watering during that time when I am gone. That and how do I keep my adorable little four legged friend from eating the plants in my absence as he has quite the history of doing. It seems the poor onions I started indoors are never going to see maturity. Every time they are looking as though they are about ready for the great outdoors he chews them down to little nubs! I have even tried giving him his very own container of kitty grass. He will eat that and then eat the other plants too or if there is too much for him to eat he lays on it until it rots. So I am still looking for something that safely keeps him away or I may just have to fill the house with so many plants that are kitty safe that it does not matter if he chews them or not. Though I do not know that James would go for that. Also I have been watching a pleasant surprise in one of my compost containers for a couple of weeks now. Potatoes! During tax season things got so hectic we had some potatoes get too old and not enough to make a meal of, so they were tossed into the compost. In all the hectic craziness the compost was not rolled as it normally is and then I noticed these beauties growing like wildfire. At first I debated whether or not to keep them but I read an article not long ago about letting a little serendipity enter your gardening plans. These guys are growing so fast and look so healthy last night I decided to help them out a bit and see what happens. I just hope the hot weather is not too much for them, for now they are just so pretty I cannot help but be excited!

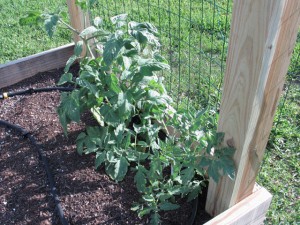
My Healthy Tomatoes

My Healthy Tomatoes

I also got a chance last night to finally get some fertilizer out there for my poor plants. The MicroLife spreads easily enough, now I just need to see if it lives up to the rave reviews. I’ll let you know. It is nice that a slow release organic fertilizer is available locally. I know back where I was, it would have had to have been special ordered.

I also planted my new transplants last night and I just cannot wait to get a few pictures. This morning they were all looking pretty good. That tri-color sage is just so pretty, I can’t wait to use it. I may just have to make some roasted chicken with home made stuffing this week.

Condon Gardens Explored

0

Posted by Aimee | Posted in Supplies | Posted on 19-04-2009

Tags: , ,

I had my first real foray into Houston proper this Friday. It was pretty fun and a whole lot bigger than I had imagined. I still want to go and see the Galleria area instead of just looking as we go past. The reason for this trip was to go to Condon Gardens and get some MicroLife fertilizer. It is a fertilizer I have read about from several sources as a good slow release organic fertilizer. I am going to try my very best to keep all of my gardening completely organic. I just know my plants are going to appreciate having some fertilizer finally! So we found the place no problem using directions from Google maps and after being there for about 2 minutes it started sprinkling lightly but still I wanted to look and see what all there was. They had a very nice selection of landscaping plants and flowers but I was more specifically after vegetables and he did have a couple varieties. I was extremely surprised to see transplants of, such as bright lights swiss chard. I behaved myself fairly well, but just could not help getting an absolutely gorgeous basil, mustard greens, 8 ball squash, thyme, and tri-color sage. As soon as it is dry enough out I will plant them. It started absolutely pouring so we loaded up the plants and fertilizer and ran inside. They have a beautiful kitty named Juliette there that was pure white, a nice contrast to my solid black one. There were pots there that were as big as my breakfast table and statues all around. None of the nurseries in Missouri I went to were anywhere near that fancy! It was sort of like wandering into a secret garden. I cannot wait to go back! They also had some books just for Texas on gardening so I had to snag one of those too.

I don’t know if any of you were out but we had to dash through torrential rain to get back to the truck and a few minutes later the hail started. We pulled into a parking lot to avoid the worst of it and hoped the hail would not dent the truck. We were fortunate that the truck did not get dented that we know of and that I got to go to Ikea. That place is not as cool as the nursery was but it was pretty friggin’ awesome! I think I could spend an entire day there just looking at stuff and on the bottom floor before the big boxed furniture they have real plants! Definitely a lot of cool stuff I do not have the money for. I can look and write down the names of cool things and dream though.

Oh, it seems I have gone off on a bit of a tangent there. Back to Condon Gardens, they do have a website: http://www.condongardens.com I definitely recommend giving them a visit if you get the chance, they are not that far from Ikea. I loved all the statues, I cannot wait to see the place when it is not raining like mad.

Composting, a Simple First Step

0

Posted by Aimee | Posted in Compost | Posted on 16-04-2009

Tags: , , , , ,

A lot of the vegetables I want to grow are heavy feeders, potatoes for example. So even with tax season looming ahead of me I started composting. It is a fantastic, easy first step towards getting a garden going, and does not require any real sort of time investment. Otherwise, all those kitchen scraps and shrub clippings go to waste. Often into a landfill where they do little more than attract unwanted bugs.

Recent Compost

Recent Compost

There are a lot of ways to handle composting and as long as you do it right it will not smell. Ants can be attracted to compost, so you may want to keep an eye on that. As long as the ants do not bother you, they are beneficial to the compost by aerating it. If you happen to have an unused corner of your yard you can turn it into a compost pile, or you can use bins or containers of your own making and there is a plethora of bins available at places like home depot or online. A couple examples include Tumbleweed Composter, Mantis Twin Composting Bin or Earthmaker Aerobic Composter – 120 Gallon.

To start out with, think about how quickly you want your compost ready and how much effort you are willing to put into it. If you just take your kitchen scraps and yard cuttings and toss them in a pile they will over time break down. Keeping it covered lightly with soil will help to keep insect numbers down somewhat and to prevent foul odors. This method is the slowest and least efficient method and also requires almost no work. The micro-organisms will eventually break down the material and you will get compost. This type of compost will consistently be at the bottom of the pile.

To speed things up a bit add a bit of air and keep your compost pile moist (not soaked). Adding air is as easy as turning the compost regularly, a lot of retail bins make that as easy as turning a handle. In our case we put the trash can lid on and roll the bin around the yard. It also helps to keep greens and browns about equal. Browns are things like sawdust, hay, leaves, wood chips or branches. Greens are lawn clippings, fruits and vegetables.

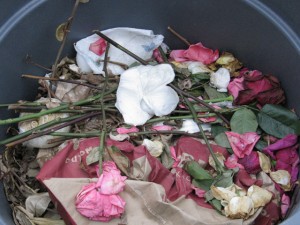
You can also help the process by not trying to compost meat, dairy or fat. These ingredients in small dosages are ok, but can attract dogs, cats or even raccoons. If you are looking to make a small first step towards starting a garden, composting is your best option. It requires no money to start and it can create the richest soil available for your fruits, vegetables, flower and plants. Many plants would thrive without the need for any fertilizer at all if grown in pure compost. So far I have been thrilled with what compost we have created, I have even taken dead roses and flowers home from ladies at the office and tossed them into the compost. Compost is the present that just keeps on giving, as you add compost to your soil it will improve the soil structure overall and provide your plants with nutrients. Compostable materials are estimated to be approximately 30% of household wastes. Also commercially available compost may not be of a high quality. Often saw dust or wood chips are used as filler, these can actually tie up nutrients plants need if in large enough quantities.

A basic list of what is not compostable is:

  • Meat, dairy and fatty wastes
  • Diseased plants or problem weeds
  • Human or pet wastes
  • Anything that may contain chemicals or has been chemically treated

When I get more time I will compile a complete guide to composting.

An excellent source of more information is: http://www.vegweb.com/composting

The Raised Bed Instance

0

Posted by Aimee | Posted in Raised Beds | Posted on 15-04-2009

So, to start this gardening adventure I looked into soil prep. First I had planned to till up the soil and plant things into the ground, that is what we had always done growing up but then I read about the damage you do to the good soil organisms and all the additives needed to make solid clay into friable soil. After a bit of research it seemed the best option for us would be raised beds. So we made our first one out of untreated pine boards to avoid any of the chemicals used on treated wood from leaching into the soil. Though they say now that the chemicals used on the treated wood should be safe for building a garden bed, I am more of a better safe than sorry sort of person.

However you do not need to go buy lumber, there are a lot of options available for making raised beds, such as metal sheeting, scrap lumber or wood sheeting, cinder blocks or just stacked rocks if you happen to have an abundance of them on hand. For us, the pine boards seemed the most economical, since I do not trust myself to not get cut on metal sheeting, which would have been cheaper and likely more durable than the wood. After building our garden bed we roughed up the grass within the bed a bit. That experience alone attests to the exercise a person can get gardening, you could undoubtedly skip this step but I thought that it may make it easier for roots to penetrate into the clay with a bit of transitioning. In retrospect I wish I had laid down a couple layers of newspaper but there is always next time.

Fiercely Protected Tomatoes

Fiercely Protected Tomatoes

Then we filled our bed with a mixture of approximately one-third organic matter (compost and peat moss), one-third vermiculite, and one-third garden soil. It did take a bit of elbow grease to get it all well mixed, but then I got to plant my tomato plants. I was so excited I couldn’t help going to check on them a few times later in the evening. Just in case some evil tomato-stealing bandits happened past and my precious tomatoes needed my fierce protection.

I did in all of this make one major mistake that I know of, I ordered my tomato plants from a mail order catalog excited to try a couple varieties not available locally. The problem comes in that they did not ship my tomatoes to me until mid April. This sounded fine to me when I made the order but of course I am used to Missouri weather, we still get snows in April. Snow in April is not a common problem down here. I learned that it will likely get too hot for my tomatoes to produce before they reach maturity but I still have hope. It seems tomato seeds should be started indoors in early to mid January and transplants set out with protection in early to mid March. I was thinking of starting my eggplant and squash soon, I sure hope it is not too late for them. In Missouri we would have started plants indoors about now to go out in a month or so. I guess it is going to take me some time to adjust to the local Houston weather. I will see how the plants handle the summer weather, it is much warmer now than I expected.

Welcome to Uber Loots Gardening

1

Posted by Aimee | Posted in Site Information | Posted on 14-04-2009

My First Raised Garden Bed

Why Uber Loots you ask? Well, Uber Loots is a gaming term I got from World of Warcraft and I am a big gamer. (Uber essentially means super fantastic, and Loots are kind of like rewards.) I love just about every game I have ever played, everything from paintball to Mario Brothers to checkers. So I have a tendency to look at things as games or self challenges. Like pushing yourself to run one more mile by envisioning that nice comfy chair waiting for you at the set finish line. Completing a game or overcoming obstacles usually has a reward and so does gardening. Uber Loots are your reward for doing well in WoW and loads of fresh produce, fewer trips to the store, healthier foods, are your rewards for gardening. That’s my new game or challenge if you will, gardening and seeing how much I can cut the cost of our grocery bills and how much food I can grow in our extremely tiny urban yard here in Houston. An area I am new to, so learning is going to be part of the process.

Through trying and experiencing we learn even though sometimes there are failures, we learn from that as well. I did, as a child, do some gardening before with my family, but in a much different climate in a place where space was not an issue, we had acres and acres of land. Not to mention soil you could till (as opposed to the clay we have here), much cooler temperatures, a large tiller to do the heavy work, and far fewer insects to eat our plants. Also we used chemical fertilizers and heavy insecticides to help us out, which at the time we did not know of the possible health risks associated with them.

So now, I seek to learn the gardening ways of the Houston area in an organic manner if at all possible, while building the ecological soil and insect web conductive to organic gardening (something I am learning more about through reading). I have been reading up on some of the challenges Houston gardeners face and I thought it would be interesting to catalog my experiences and findings for others with similar goals and questions. Gardening has a lot of rewards, I remember as a child that few tastes can compete with a home grown tomato fresh out of the garden or corn on the cob straight off the grill with a bit of butter. I plan to learn when the best time for planting various vegetables in Houston is and what gardening tactics will provide the largest yields of fresh produce without hurting the environment.

Soon I will write an “About” page to go into more detail on my exact goals. Also, I welcome any advice you seasoned gardeners out there are willing to share. I am even considering forums so we can all share some hints and tips here and there and maybe we can all learn together. I cannot wait to learn more about organic gardening, raised beds, indoors and container gardening methods, as well as how to reduce all the pest insects around here without killing the beneficial insects.

It is my hope that with some time and experience I can help others in the area avoid the mistakes I will invariably make and that by making this site I can garner more of an interest in gardening in general. Especially gardening in the city where space is limited and by my age group where it seems there is a diminished interest in growing things. I am willing to do the research and find out what the best techniques are and through trial and error, I will share the results with anyone willing to come along for the ride. Let’s make a bounty of fresh produce and turn it into tasty meals that even those of us who aren’t veggie lovers can enjoy. So, I heartily welcome anyone and everyone out there to Uber Loots!