Posted by Aimee | Posted in Guides | Posted on 20-05-2009
Now is still an okay time for transplanting houseplants. Though technically you can transplant at any time the general belief is that it is very best to do so before a growth period. Here in the last week I transplanted two house plants and I will be transplanting the African violet tomorrow night. A bit later than I wanted to but other things just took priority. Two of the plants I have not yet identified, they came with the house as housewarming presents.

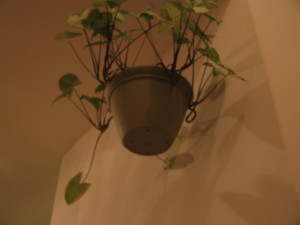
Unidentified vining plant
To start with you will want to cover your work area with newspaper if it is available, this makes clean-up much easier. Also you definitely want to do this somewhere that there is not carpet, it is much easier to sweep up any spilt soil than trying to vacuum it up. You may want to gather a couple of tools together at this point: the pot into which you plan to place your plant(this should have a drainage hole and something like a saucer to catch excess water), the plant being transplanted, decent quality potting soil, gloves, and a water source.
Now that you have everything gathered together let’s put on our gloves and get to work. First lay down a layer of soil into the pot, some people like to put a layer of rocks or marbles to prevent soil from escaping out of the drainage holes, recently though I read that this does more harm than good, which way is better I do not know. Then over the pot you are transplanting into tip the contained plant upside down supporting the stem with your hand spread out and inspect the root ball. If it looks very tightly bound now is a good time to gently work the roots outward with your fingers being careful not to tear any of the roots. Now set your plant level into your new pot. Make sure the pot is not too big or small for its new occupant, one assuring the proper size and that it is level by adjusting the soil below the plant to make it so, fill in around the sides with your potting soil gently, if you want you can add in a small amount of granulated slow-release organic fertilizer such as MicroLife. When the soil is about an inch or less from the top of the pot, gently firm the soil down around the plant making sure not to place any pressure on the stem. If there seems to be too much room around the top add some more soil or you can add a layer of decorative stones over the dirt, this can help deter house pets from digging in the soil. Now water your plant deeply and do not water again until the soil feel dry even when you stick your finger an inch deep into the soil.
There you go, that’s all there is to it. I am sure your houseplant will be quite happy in its new home. Don’t forget to rotate your pot about a quarter inch weekly to keep light distribution even and dust the leaves on occasion with a damp paper towel to remove any dust or mite build-up. Also it is good to remember that it is better to water plants less often and deeply to help prevent salt build-up. In general house plants do not require a great amount of care and they are beautiful as well as purify the air in our houses which often times contains even more pollutants than the air outside.

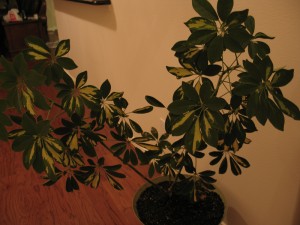
This baby is about 4.5 feet tall
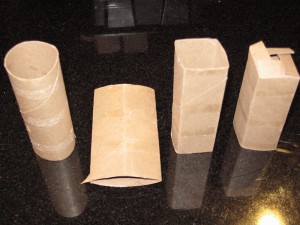
It is by no means a new idea to use toilet paper rolls to start seedlings in, but it is definitely an idea worth sharing. The toilet paper rolls are a byproduct of household life and if folded flat store quite neatly in a quart sized storage baggie pinned up inside the bathroom cabinet. Then when you are ready to plant your seedlings you get those toilet paper rolls out and follow the simple steps below. This first picture follows steps one through four, left to right.

Steps 1-4 starting at the left
- Start with a empty toilet paper roll, having a few bits of toilet paper clinging to the roll won’t hurt it in the slightest, the only reason to remove those bits is if they annoy you.
- Fold the toilet paper roll flat; just squash it with your hand onto the counter. Then center the newly made crease and fold it flat again. Doing this will make the roll into a square form.
- Now open your roll up, it should be nice and square at this point. At the bottom of one side cut a half inch slit at each corner. Then fold those slits outward and crease them.
- Now starting with whichever flap you chose fold each flap in going clockwise, when you get to the last flap tuck the end under the first flap. Just like when you close up a cardboard box.
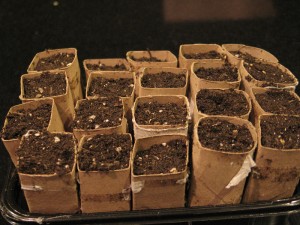
- Now, I find it is easier to put them all into a tray packed tightly and fill them with dirt all at once. Now that they are filled with dirt and ready to go just plant your seeds in and water like normal.
- When it is time to transfer to a bigger pot or outside into the ground your pot can be planted with the plant. I would just advise opening the bottom up with a gentle tug an inch or so above the plants new resting place so roots can get through even easier. (Though some roots may have already grown through the sides of the pot by now) Also make sure that the top of the cardboard is completely covered with dirt. Just to make sure the cardboard cannot wick away any moisture.

Filled and ready to go
The cardboard will finish degrading in the soil. Well done on recycling! Every little bit done by each of us to reuse and recycle helps. Don’t let anyone tell you one person’s contribution or lack thereof makes no difference because it does make a difference. I also wanted to note that the idea to cut the bottoms and make flaps to fold in for a solid base came from a member: Joeysplanting of Myfolia. These can be made without this step and shoving them together tightly into a tray certainly helps with this but I have made mine with the bottoms ever since I saw the idea and I just love it so my thanks go out to them.
Another tip, to keep track of what is planted in each pot use non-toxic markers to mark right on the rolls what you planted in them. I also like to add the date to keep track of also.
Posted by Aimee | Posted in Guides, Raised Beds | Posted on 22-04-2009
Previously, I mentioned how appropriate I felt raised garden beds are for the Houston area. What I did not talk about was how easy it is to make a raised bed even without framing materials. The edges may not look as neat but the cost is very low. You will only need a couple of things before you can get started. First you will need a lot of newspaper. If you do not have easy access to this, you can ask your neighbors for theirs when they are done with it or get the grocery circulars when they go out of date, or even just save the grocery circulars for a couple of months. Also you will need bags of peat moss, compost, garden soil, fertilizer is preferred and seeds or transplants to go into your ready garden.
The soil mixture does not have to be an exact 1-1-1 ratio, you can mix it up a bit just remember that it is very important to have a lot of organic matter in the soil. The organic matter in the materials I suggested comes from the peat moss and compost. If you have compost from your home this is even better. You can space this project out over a couple of days or even weeks if you want to, just make sure that if you have exposed loose soil you keep it moistened to help it not fly away.
The first thing you will want to do is take a hose or piece of yarn and mark off where you would like your garden bed to lay. You can make it any shape you want, so long as you can reach to all the spots in the middle. It is a good idea to take a look at your shape from many angles and think if for any reason the shape or location needs altered. Is the garden bed going to be in a high traffic area? Is there room for the mower to get around it easily? Is there convenient access to water? Will the vegetables or flowers get enough sun? Any thing else the garden might be in the way of?
The nice thing about this method is that there is nothing you need to do to prepare the soil. The whole raised garden bed is going to go right on top of the newspaper, which will be covering the current grass or soil to act as a weed barrier. Once you are sure that the garden bed is exactly where you want it lay out newspaper within the borders, cut the papers to fit neatly and make sure the whole area is at least ten sheets thick. Then, wet the newspaper lightly to keep it from taking flight. Now you can remove your border marker. Then the soil materials go on in layers on top of the newspaper, each layer about two inches or so thick, the order is not overly important just add in some organic slow release fertilizer with each level. Make sure to use the recommended fertilization rates, just divide it by the set of layers you plan to have, so half as much for two sets of layers or one third as much for three sets of layers. I do suggest having the top layer be top soil. After a while though it will all get mixed together so this part doesn’t really matter it is mostly because the garden soil will look best on top. You do want to slant inward slightly from the base to the top. That way your bed will not spill over the borders you have set.
Mist the soil carefully at first and then plant your seeds and/or transplants. All you need to do is scoop out a little soil where the transplants or seeds are going and then back fill. Then water the bed more thoroughly. Congratulations you now have one very nice, very easy, low cost raised garden bed. If later on you want to dress the beds up a bit, you could just get some cheap landscaping stones and surround it.


