Posted by Aimee | Posted in Uncategorized | Posted on 06-09-2009
Tags: sweet potato, sweet potatoes
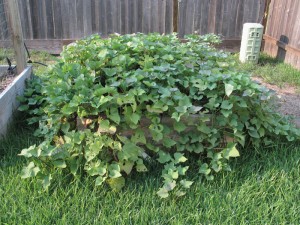
Three months ago or so I wrote about planting sweet potato slips. Now, the ones I planted then are ready to come out of the ground, out of what we have termed the thing (as the original bed itself is no longer visible) and I can hardly wait but, I will continue to wait because they are still growing larger and I also want to have a few left for Thanksgiving. Since we are so far South there is still time to get another crop in for this year if you hurry. I cannot sing enough praise for this vegetable. It is so easy to care for, after I planted the sweet potatoes I mulched carefully around the vines and I have not had a single weed in that bed. Also they have few pests to worry about and will continue to grow until frost kills them (though they prefer warmer weather). As if those fantastic bonuses were not enough, they are also extremely high in nutrition and there are as many ways to make them as a person can imagine. Also there are many varieties with varying degrees of sweetness; there are a few varieties that supposedly are a passable substitute for Irish potatoes. (I have not tried these varieties yet though so that is all just hearsay.) Oh and did I mention that sweet potatoes are fairly drought resistant once established?
To make the slips is easy, though if you want another crop in you will need to purchase sweet potato slips at this point, you can just use a sweet potato from this harvest or one of a variety you like from the grocery store. Fill a sturdy water tight container about 2-3 inches with sand and bed the sweet potato (uncut) down into the sand, keep the sand moist and warm. Over time the potato will grow sprouts that will form leaves, once these reach 2-3 inches each with a good strong leaf or two you can break them off and let their ends rest in water. After a couple of days the ends of the shoots resting in water will have formed roots. When you have the desired number of rooting slips they can be planted out into soil (make sure to water them thoroughly to help them make the transition from water to soil easier. This is best done in the evening so they do not get too much sun right away, light shade for a few days to a week would also be beneficial to help the plants get a fast start.
Sweet potatoes do fine in raised beds as long as they have at least 12 inches of soil for root formation. (A note here; I had spaced mine about 9 inches apart initially, I later found out it is a good idea for better production to give them a little more room) Like potatoes the vines can be hilled up as they grow, more vine/soil contact means more potatoes. However the more potatoes there are the smaller they will be in overall size. I recommend fertilizing their soil before planting but if you did not do so, a week or two after planting or when planting is a fine time to side dress with a good organic fertilizer like MicroLife. If you can I would mulch the vines shortly after planting, that way the vines cannot root as they grow across the ground, or just lift the vines once or twice a week to prevent rooting. The vines will also grow vertically if given the chance.
When planting space the slips approximately 12 inches away from each other, they will need plenty of room for good root development. After 90-120 days (dependent on variety) you can examine one plant carefully and if the tuber(s) have reached the desired size then you can start harvesting. Until it is nearing time of frost you can leisurely harvest plants as you are ready to use them. When there is a danger of frost you can dig the potatoes gently (you do not want to bruise or cut them) let the potatoes dry on the counter on newspaper thoroughly then you can save them in mesh bags in a cool place (about 60 – 65 degrees is ideal) until ready to use, use the least good ones first. If stored properly sweet potatoes can last a long time, don’t forget to start slips again come late February or March for springs crop!

